If your cat shakes its head, often scratches its ears, or emits an unpleasant odor when you are close, there’s no need to wait for the discomfort to worsen before taking action. Knowing how to use cat ear cleaner correctly helps keep the ear canal clean, limits earwax buildup, and makes daily ear care easier.
A cat’s ear is a delicate structure. That’s why cleaning should not be improvised or done too frequently without a specific reason. The goal is not to "wash" the ear, but to gently remove debris, earwax, and impurities while respecting the skin’s balance. When the product is well formulated and the technique is correct, cleaning becomes an effective support against irritation caused by dirt, secretions, and bad odors.
When you really need to clean your cat’s ears
Not all cats need the same cleaning frequency. Some produce little earwax and keep their ears clean for a long time, while others tend to accumulate more debris, especially if they have sensitive skin, live in dusty environments, or have had episodes of ear redness before.
The signs that deserve attention are quite clear: visible earwax, secretions, unusual odor, the cat shaking its head, scratching, or showing discomfort when you touch the base of the ear. In these cases, cleaning can be helpful, but there is an important distinction to make. If you notice marked pain, strong redness, abundant dark discharge, swelling, or if the cat won’t even let you touch it, a veterinary check is needed before cleaning. Ear cleaner does not replace a diagnosis when there is an active clinical problem.
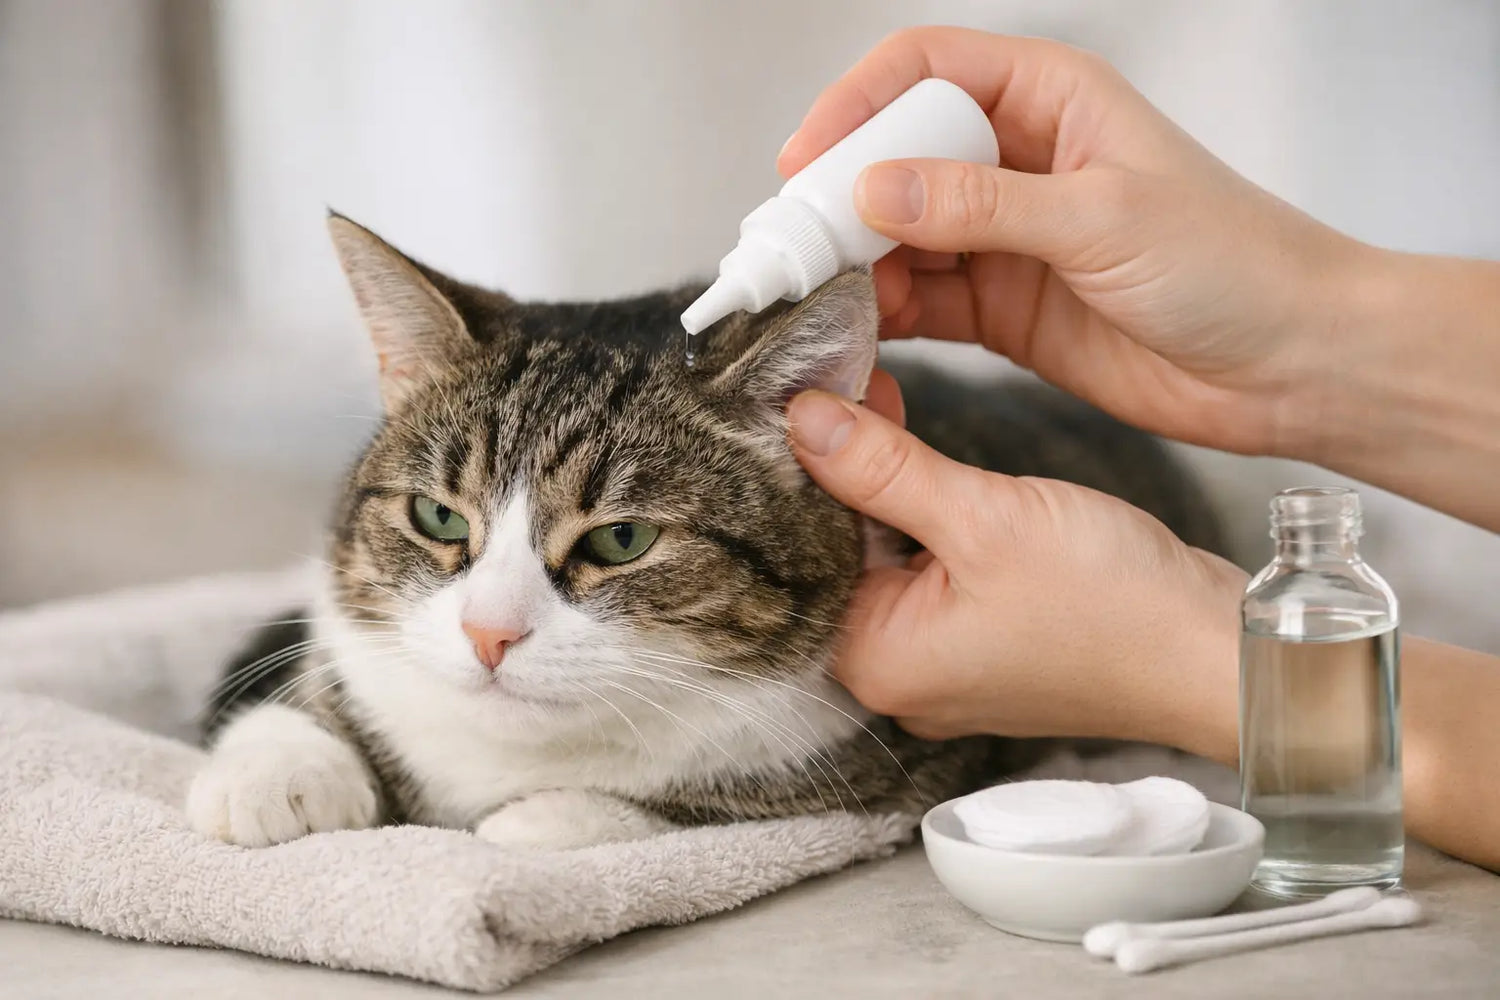
How to use cat ear cleaner without stressing your cat
Preparation and gentleness make all the difference. The best time is when the cat is calm, perhaps after resting or in a quiet environment. Avoid sudden movements and prepare everything beforehand: cleaner, soft gauze, and a stable surface.
Start by gently lifting the ear flap to see inside. If there are only superficial residues, apply the cleaner according to the product instructions, in a moderate amount. After application, gently massage the base of the ear for a few seconds. This step helps the liquid spread and dissolve the material inside the canal.
Then let the cat shake its head. This is a helpful reflex, not a problem: it helps bring softened earwax to the surface. Only then remove visible residues with clean gauze, without pushing deep inside. Cotton swabs should be avoided because they can compact earwax and increase the risk of irritation or microtrauma.
If the cat is very wary, it’s better to clean one ear at a time and stop if it shows intense stress. A well-done cleaning takes only a few minutes. Forcing it worsens the experience and makes future care more difficult.
The most common mistakes in ear cleaning
The most frequent mistake is cleaning too often. Excessive cleaning can alter the skin’s protective film and increase local sensitivity. Using products not specifically made for animals is also a wrong choice: harsh fragrances, alcohol, or formulas not designed for a cat’s ear flap can irritate an already delicate area.
Another mistake is choosing a product just because it "degreases" a lot. A cat’s ear doesn’t need aggressive action but functional and well-tolerated cleaning. This is where quality natural ingredients make a difference, as they can cleanse while helping maintain the skin in a comfortable condition.
Which ingredients truly support ear health
When evaluating a cat ear cleaner, the formula matters more than just the product’s texture. Ingredients like aloe, calendula, propolis, coconut oil, and tea tree oil are interesting because they combine cleansing action with support for normalizing the ear environment.
Aloe is valued for its soothing and moisturizing properties. In veterinary and human dermatology, aloe’s polysaccharides and other bioactive compounds are studied for their role in supporting the skin barrier and promoting better local tolerance. Calendula is known for its soothing effect on sensitive and reddened skin. Propolis is often used in topical products for its functional profile in maintaining a clean skin surface exposed to impurities. Coconut oil contributes to gentle cleansing, while tea tree oil, if properly dosed and included in formulas specifically for veterinary use, can help control the superficial skin environment.
The key point is this: it’s not enough for an ingredient to be well known. It must be present in a formula designed for cats, with appropriate concentrations and a balance that prioritizes safety, gentleness, and practical effectiveness.
How to choose the right ear cleaner
A good ear cleaner must do three things at once: clean, respect the skin, and make the routine easy. If after use the ear looks clean but the cat scratches more, the product is probably too harsh or not suitable for its sensitivity.
That’s why a solution like otorì ear cleaner is especially suitable for daily ear hygiene management in cats. The presence of aloe, calendula, propolis, coconut oil, and tea tree oil meets a real need: to gently cleanse the outer canal and ear flap, helping reduce buildup, odors, and discomfort without weighing down the skin with unnecessarily harsh formulas.
For those seeking a natural but credible approach, the difference lies in the consistency between ingredients and results. Miracles aren’t needed. What’s needed is a product that truly helps keep the ear clean, more comfortable, and easier to manage over time.
How often to use it
The honest answer here is: it depends. A cat with generally clean ears may only need the cleaner occasionally. A cat prone to earwax buildup or under veterinary care for ear issues may require a more regular routine.
In the absence of specific instructions, frequency should be adjusted by observing the animal. If earwax accumulates quickly or odor returns soon, it’s useful to consult the vet to understand if more hygiene is needed or if there’s an underlying cause. Cleaning is a valuable support but should not mask signs that require further investigation.
What to expect after cleaning
After correct use, the ear should look cleaner and the cat more comfortable. It may shake its head for a few moments, which is normal. What should not happen is increased discomfort, obvious redness, or a strong irritation reaction.
If this occurs, stop use and seek veterinary advice. The same applies if the earwax is very dark, if discharge appears, or if the odor is strong and persistent. In these cases, cleaning alone is not enough.
How to make the routine easier over time
The secret is not to hold the cat down forcefully but to build a short, predictable habit. Gently touching the ears even when you don’t need to clean them, rewarding cooperation, and choosing calm moments makes everything easier. Cats accept better what they recognize as part of a non-threatening routine.
The owner also plays a role. If you hesitate or make quick movements, the cat senses it immediately. A confident, gentle, and repeatable gesture is worth more than any improvisation. Good ear hygiene is not a complicated procedure but a concrete form of daily prevention.
When it comes to ears, the real difference is in the details: observing signs, intervening before discomfort increases, and choosing formulas designed to respect the cat’s sensitivity. That’s how simple cleaning becomes a caring gesture that truly protects.

